“Don’t get me wrong — I find my children’s work just as precious as the next mom… just not taped to every single surface of my house all at the same time…” — Jessica, Mom of 4 from Laurens, South Carolina.
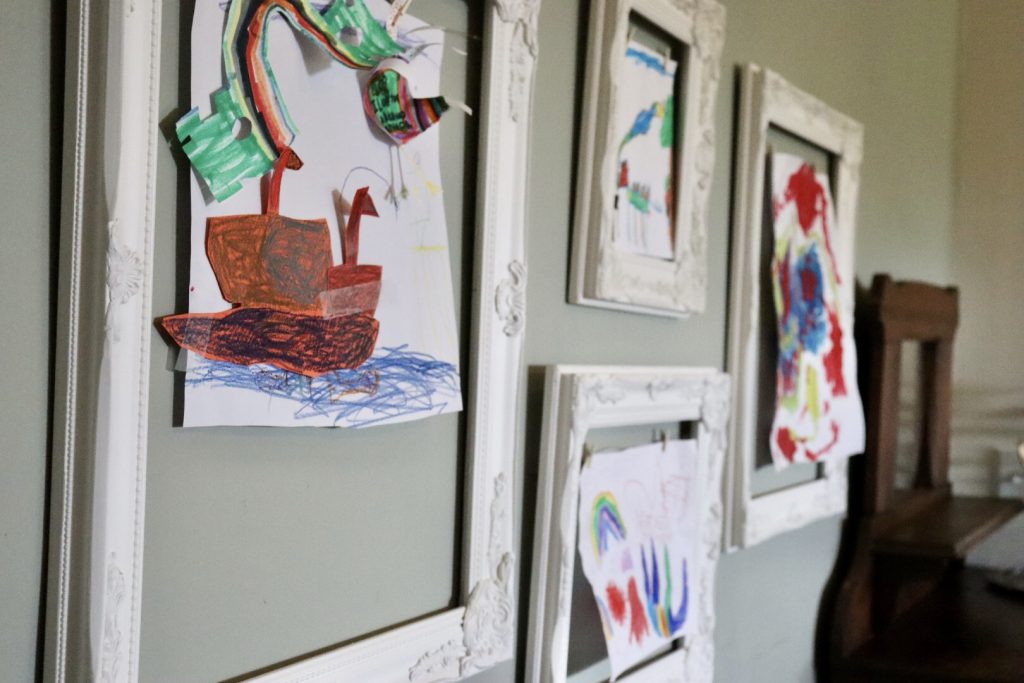
Children’s artwork is precious — there’s no doubt about that. As a mother, there’s nothing quite like receiving that carefully crafted “I’m thankful for my Mom” turkey made from the shape of one extra-special little hand. That’s one for the keepsake box every time. But how do you display that (and the other 20 priceless pieces of artwork) in a way that lets you enjoy it all without becoming overwhelmed by paper and tape every time you walk into your kitchen?
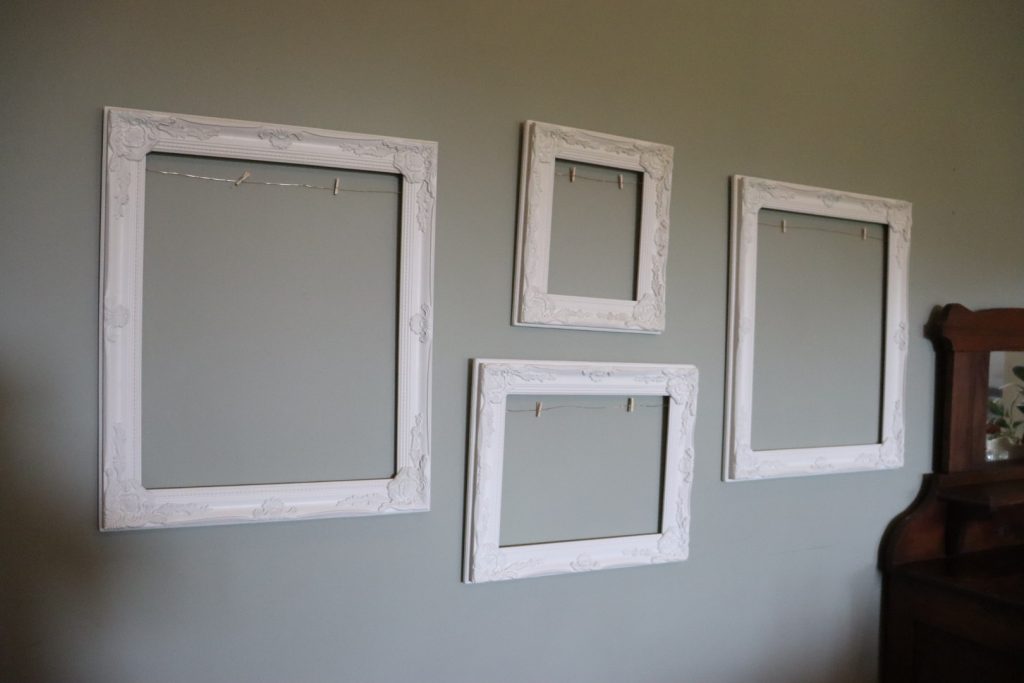
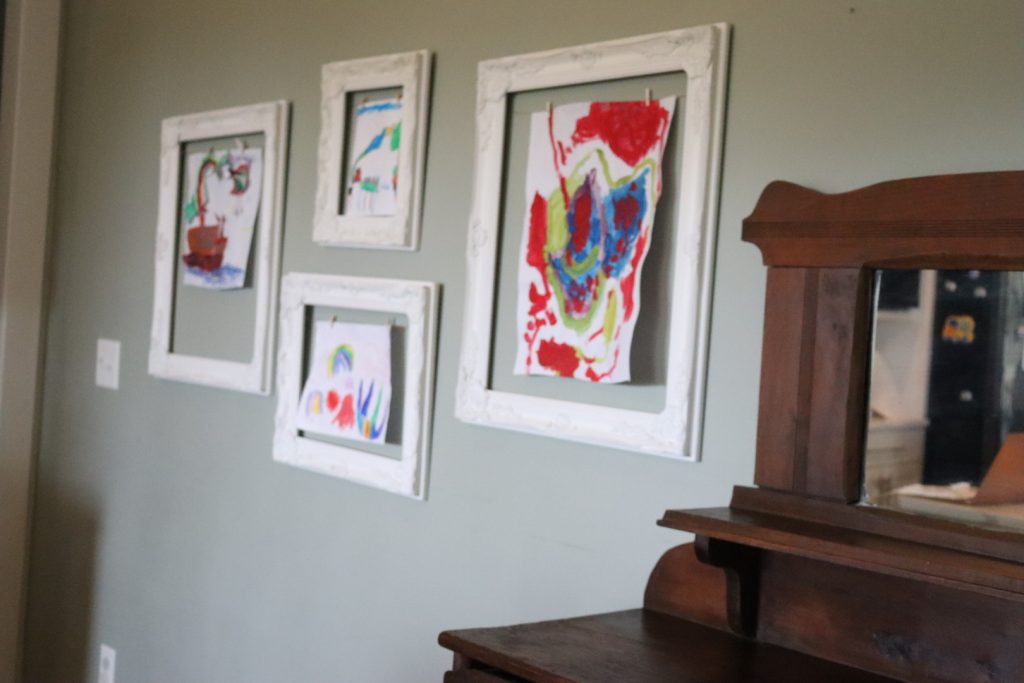
Here was one local mom’s solution for displaying her children’s artwork in a flexible, organized way that her kids can manage on their own! Win-win-win.
Supplies:
- Frames. The frames from this example were purchased at Hobby Lobby, but any will do! Consider mixing and match different colors and textures to create a unique look that compliments the style in your home.
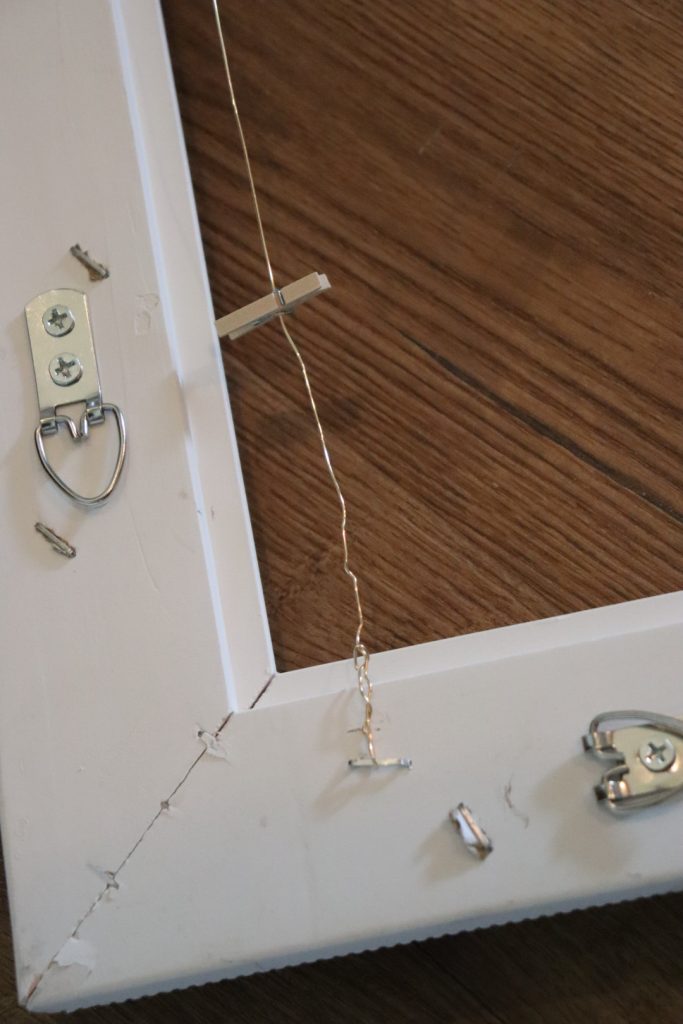
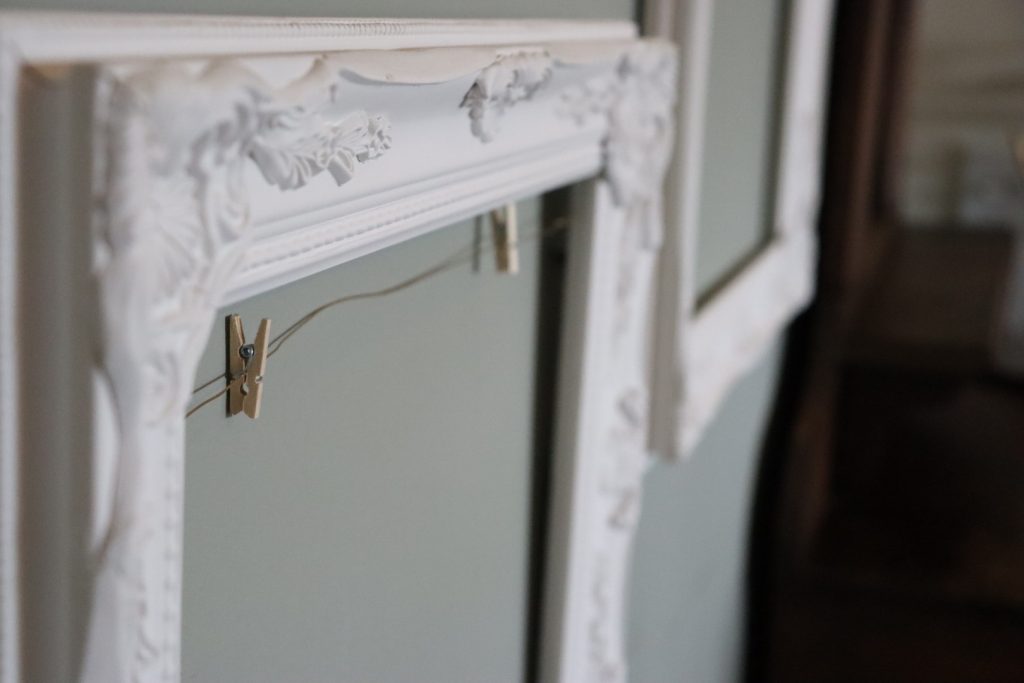
- Wire, ribbon, or string. You will attach this to the back of the frames. A gold wire was used in this case, but there are all sort of colors and textures that could work for this. Check out Amazon for different options!
- Clips. The type of clip you use to attach artwork to your wire is also limited to your imagination! This example used small wooden closepins like these.
- Wall hanging kit, if needed. Check your frames to make sure you have what you’ll need to hang them.
- Priceless artwork. 🙂
Tools:
- Staple gun and staples.
- Hammer or drill (for hanging your frames on the wall).
That’s it! Now follow the steps below!